
The purpose
This guide describes setting up a Vite environment using Phaser 3, a 2D game engine for Javascript.
We assume you already have a working environment with Node.js and other necessary dependencies installed.
Use template
Fortunately, a Vite template utilizing Phaser 3 is available, and we will be using it.
Get template
The template can be obtained in either of the following ways.
clone from the repository
Clone from the link below.
(For those wondering, ‘What is a clone?’, please try downloading the zip file below)
After the clone is complete, copy everything except the .git folder to the project folder.
Down load a Zip
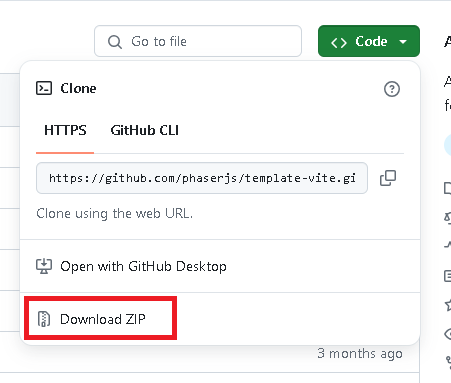
access the following page.
Click “Code” near the center of the top of the screen.

Click Download zip.
After the download completes, extract the contents of the template-vite-main folder within the ZIP file into your project folder.
Initialize project
Open Visual Studio Code and open your project folder from the “Open Folder…” option in the File menu.
Then, in the Visual Studio Code Terminal (select View > Terminal if it’s not visible), run the following command.
npm installThat’s all the preparation.
Steps to bundle
Modify code
there are code files under Src folder.
Start test server
Run the following command in the terminal
npm run dev This template is hardcoded to port 8080.
bundle
Execute the following commands in the terminal.
npm run buildThe bundled files are saved to the dist folder.
Verifying the bundled files
Update the setting file
Open package.json. Add a “Preview” line to the “Scripts” section as shown below, and save.
    "scripts": {
        "dev": "vite --config vite/config.dev.mjs",
        "build": "vite build --config vite/config.prod.mjs",
        "preview": "vite preview "
    },
Execute
Execute the following command in the terminal.
npm run previewA URL will be displayed below. Accessing this URL in a browser will render the bundled file.
➜ Local: http://localhost:4173/Result
We are able to create a Vite environment with Phaser3.

コメント