
The purpose
Normally, Stable Diffusion Forge requires an NVIDIA GPU (like a GeForce card).
While ComfyUI provides a .bat file to launch it on a CPU (without a GPU), it does not offer a .bat file specifically for launching with an AMD GPU (DirectML).
This guide will introduce how to launch ComfyUI using an AMD GPU with DirectML.
Notice
Not all Custom Nodes (Plugins) will work. For example, Flux.1 and Janus did not function. The reasons vary depending on the specific node. (Some are hardcoded to “cuda,” while others use features like float8, which torch-directml might not support.)
Environment Setup
Download
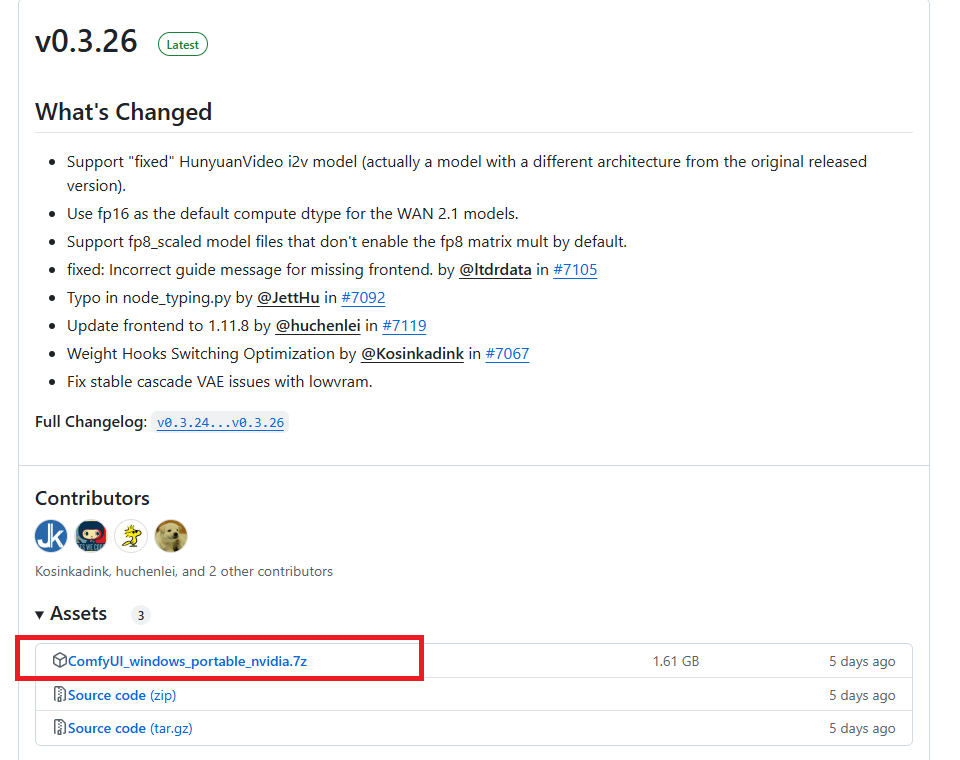
Open following page.
Click on ComfyUI_windows_portable_nvidia.7z located within the Assets section of the version tagged “Latest” (likely the top one) to download it.
Extract the downloaded ComfyUI_windows_portable_nvidia.7z to your desired folder.
Make a bat
Create a new file with the following content in Notepad (or any text editor) and save it as run_directml.bat in the folder where your run_cpu.bat file is located.
.\python_embeded\python.exe -s ComfyUI\main.py --directml --windows-standalone-build StartUp
Now, simply run the run_directml.bat file from your File Explorer.
Keep in mind that the first launch will take some time as it downloads and sets up the necessary components.
How to Use It (Simple Steps)
Here’s how to create images using Stable Diffusion.
Install model
Please refer to the following page for instructions on downloading models.

Copy the downloaded models to ComfyUI_windows_portable\ComfyUI\models\checkpoints.
Make workflow
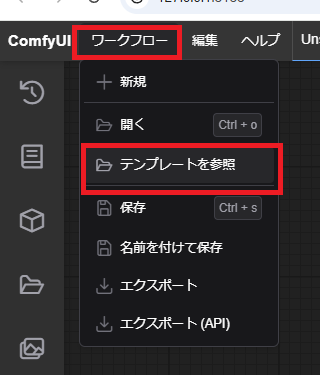
From the top-left corner of the screen, select Workflow → Browse Examples.
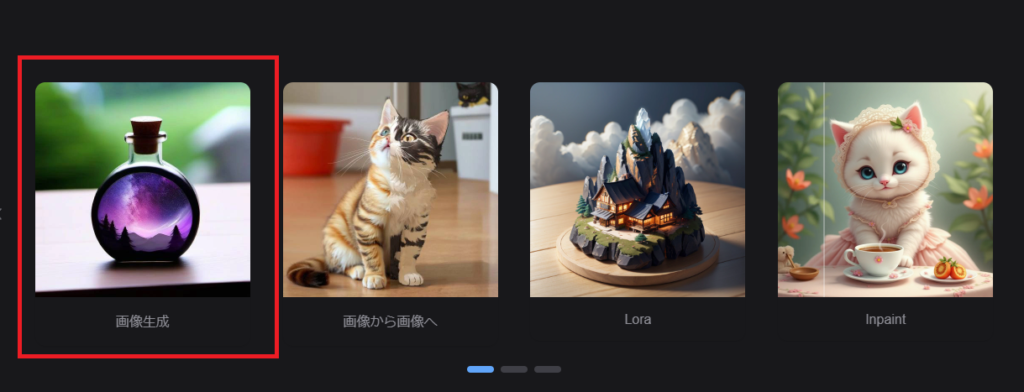
Select Image Generation.
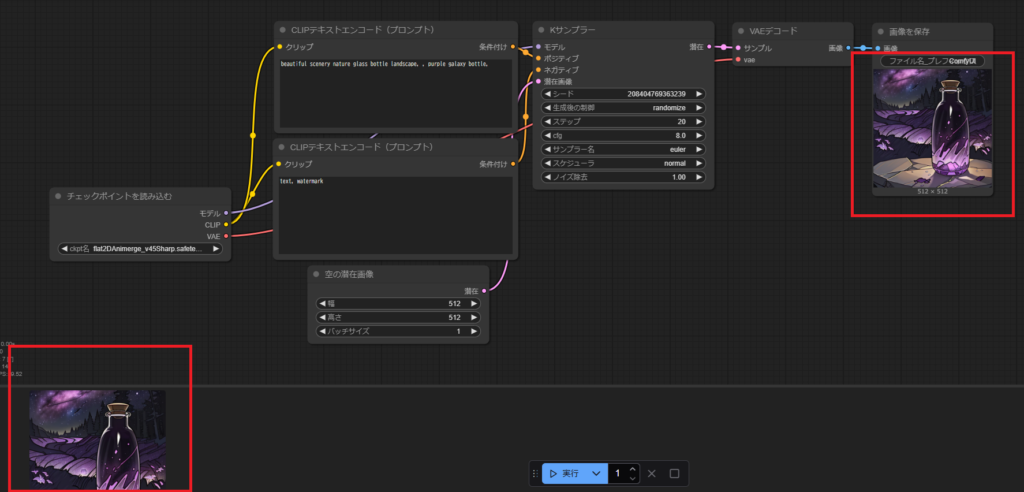
On the displayed workflow:
Enter your negative prompt in section ③.
In section ①, select the model you want to use.
Enter your positive prompt in section ②.

Click “Execute” at the bottom of the screen.

Once the process is complete, the generated image will be displayed on the right side and at the bottom, as shown below.
Result
You have successfully performed Stable Diffusion image creation using ComfyUI with an AMD GPU (DirectML) locally!
Trouble Shooting
If an error appears, please modify the .bat file you created as follows.
This may help avoid errors by reducing VRAM usage.
.\python_embeded\python.exe -s ComfyUI\main.py --directml --windows-standalone-build --lowvram --use-split-cross-attention --force-fp16 --fp16-unetAlso, sometimes an error can occur repeatedly once it first appears.
If you encounter an error, it’s best to close the ComfyUI command prompt and restart it.

コメント
I do not even know how I ended up here, but I thought this post was great.
I do not know who you are but definitely you are going to
a famous blogger if you aren’t already 😉 Cheers!
Simply wish to say your article is as surprising. The clarity
in your publish iis just excellent and that i could think you are knowledgeable in this
subject. Well apong with your permission allow me to take hold of your RSS
feed to keep updated with drawing close post. Thank you
1,000,000 and please keep up the rewarding work.