
The purpose
Sometimes, images generated by Stable Diffusion can be blurry or have low contrast.
Here, I’ll introduce two methods to improve them.
Using a VAE
The first method is to use a VAE.
For instructions on how to install and use a VAE, please refer to the following article.

Recommended VAEs
As introduced in the article above, I will introduce two VAEs here as well.
Using these VAEs to generate images may improve image quality.
General-purpose VAE
This VAE is from Stability AI (the developer of Stable Diffusion).
It can be used with both photorealistic and anime-style models.
You can download it from the following page under the file name “vae-ft-mse-840000-ema-pruned.ckpt.”
VAE for anime images
This VAE is for anime images.
You can download it from the following page under the file name “kl-f8-anime.ckpt.”
Example
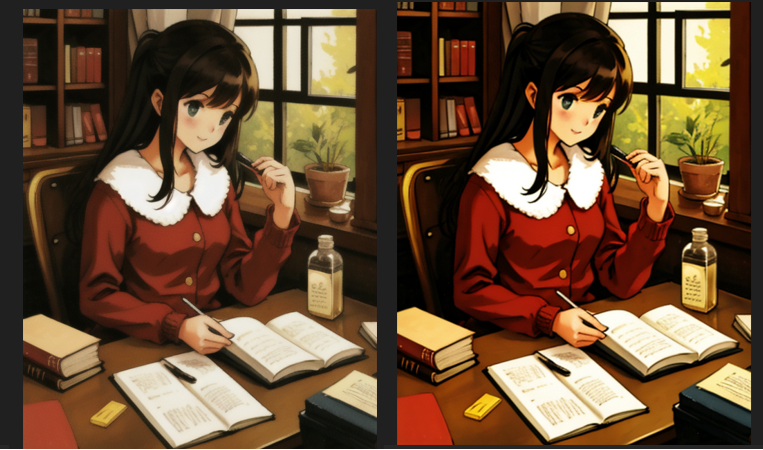
vae-ft-mse-840000-ema-pruned
This is an example using vae-ft-mse-840000-ema-pruned.
The image on the left was generated without a VAE, while the image on the right was generated using vae-ft-mse-840000-ema-pruned.
You can see that the image on the right has higher contrast and is much clearer.
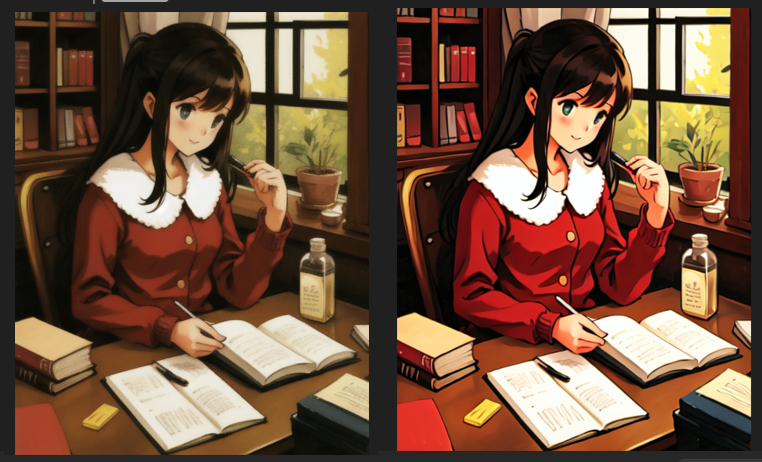
kl-f8-anime
This is an example using kl-f8-anime.
The image on the left was generated without a VAE, while the image on the right was generated using kl-f8-anime. You can see that the image on the right has higher contrast and is much clearer.
The contrast appears higher than in the vae-ft-mse-840000-ema-pruned example. (I believe this is because kl-f8-anime is a VAE specifically for anime-style images.)
Others
Do VAEs also work on AMD GPUs (DirectML)?
It depends.
The two VAEs I introduced on this page will work. However, VAEs that use formats such as fp8_e4m3fn are highly likely to not work.
Use Hires. fix
The second method is to use Hires. fix to increase the image resolution and make the image clearer.
How to use
Check the box next to Hires. fix to enable it.
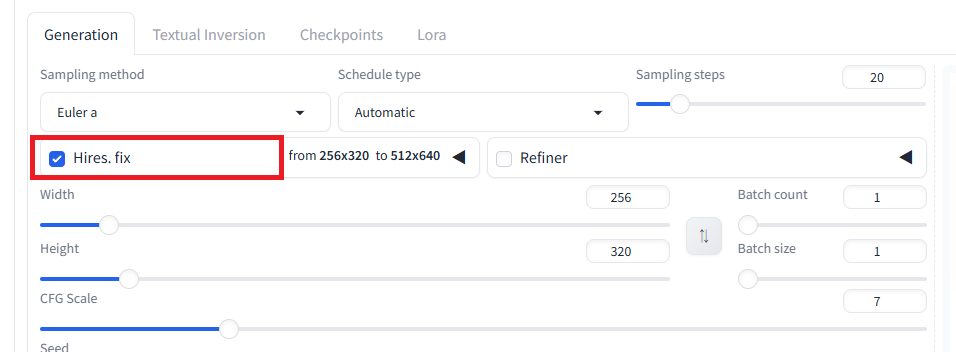
By default, the generated image will be enlarged by 2x. If necessary, you can reduce the image size using an external app (like Paint, etc.).
Generating a 2x enlarged image requires a significant amount of memory.
To reduce memory usage, you can decrease the Width and Height values.
However, depending on the model, making these values too small might prevent you from generating a proper image.
It’s important to note that Hires. fix does not simply enlarge the original image cleanly.
Because of this, it may generate an unintended image (one that is different from the image generated without Hires. fix).
If this happens, you can set a lower Denoising strength value to generate an image that is closer to the original.
Example
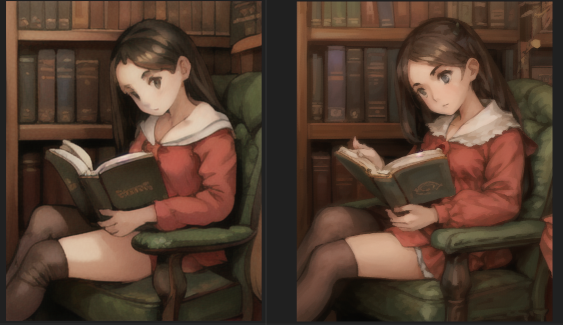
The image on the left is without Hires. fix, and the image on the right is with it.
Even though the image has changed quite a bit (Denoising strength = 0.3), you can see that the image on the right is much clearer.
Result
You were able to generate clearer images with higher contrast using Stable Diffusion.
コメント